Buckwheat Waffles (gluten-free)
Posted: October 16, 2015 Filed under: Breakfast | Tags: breakfast, buckwheat, coconut sugar, glutenfree, healthy recipes, instabreakfast, meals under 15mins, organic, quick cooking, waffles Leave a comment

Buckwheat waffles are our new current favourite and we love to add some i2cook coconut sugar for a healthy twist. Buckwheat flour is a healthy and nutritious flour which works great for baking too. It is a good source of fiber and can substitute all-purpose flour any day!
This tried and tested recipe (several times) calls for all unrefined ingredients. Top these waffles with some fresh cut fruits, peanut butter or drizzle some organic honey for some extra yumness!

Ingredients
Makes 8 medium sized waffles
120 gms organic buckwheat flour
1 tbs coconut sugar
1 tsp baking powder
1 tsp baking soda
1/4 tsp rock salt
4 tbs melted coconut oil or butter
1 large egg
1 1/4 cup of buttermilk
Procedure
Pre-heat your waffle maker. Meanwhile, measure and mix all the ingredients well. Pour the waffle batter on greased waffle maker. Allow it to cook until crisp or done depending on your liking. Serve warm with your favourite topping. Served ours with some organic honey, coconut sugar, homemade butter, walnuts and pomegranate.

Chia Seed Pudding
Posted: August 28, 2015 Filed under: Breakfast, Vegan | Tags: chia seeds, glutenfree, i2cook coconut sugar, i2cook peanut butter, omega 3, superfood, vegan Leave a comment
Chia seed pudding is the new shinning food for the health conscious people. Chia seed is high on fiber and works great as a post workout breakfast or a snack. This ancient grain is now locally grown in some parts of Karnataka which works out cheaper than the imported ones. Read here about the nutritional benefits of chia seeds.
The overnight chia seed pudding is so easy to make that it requires less than five minutes to assemble. I like to make my chia pudding with almond milk, sweetened with honey or coconut sugar. Homemade almond milk can be made before hand and refrigerated for 4-5 days. In the morning, I just season my pudding with i2cook’s peanut butter, cacao niba, nuts like walnuts, sunflower seeds and fruits. You can also soak chia seeds overnight in PB banana smoothie for some extra flavour and energy!


Ingredients:
1/4 cup chia seeds (40 gms US cup standards)
1 cup almond milk (240ml)
1 tsp honey
Procedure:
Measure and mix all the ingredients in a glass jar. Refrigerate for min 3-4 hours or overnight. Eat chilled with your favorite topping.
PB energy bites
Posted: July 7, 2015 Filed under: i2cook Products, Nibbles, peanut butter, Peanut Butter Recipes, Vegan | Tags: cycling, dates, energy bites, gluten free, i2cook, organic, peanut butter, snacking, vegan Leave a comment Snacking is one of the best way to stay fit and sharing with you this super easy recipe. This recipe is especially good for women as it contains essential nutrients like Iron from dates, Vitamins from sunflower seeds , Protein from i2cook peanut butter, Essential fatty acids from cacao nibs and Calcium & Fiber from chia seeds. The good news is that these energy boosters can be customized to your liking. You can add chocolate chips, walnuts or any kind of ingredient that you like.
Ingredients:
200 gms dates, pitted
2tbs i2cook peanut butter
1tbs cacao nibs
1tbs roasted sunflower seeds
1/2 tbs chia seeds or flax seed powder
Procedure:
- Pulse the dates in a blender into fine pieces so that it has enough stickiness to roll into a ball
- In a bowl mix all the ingredients along with dates
- Roll into a ball of desired size
- This can be stored in an air tight container for a week or refrigerated for a month. Yields about 15 medium sized pieces.

Introducing a new product & recipe for nutty noodle
Posted: April 28, 2015 Filed under: i2cook Products, Mains/Veg | Tags: eat local, i2cook, noodles, organic, peanut butter, peanut crunch, powdered peanuts, spicy peanut butter, vegan, weeknight meals Leave a commentSpicy Peanut Butter is a versatile product and works great for salad dressings or noodle based dishes. You can also mix this versatile product with your plain rice and curds. At i2cook, we have also introduced a new product called the “i2cook Peanut Crunch” which are powdered peanuts, can be added to your noodles, salads, soup, sabudana kichidi or Indian style vegetable as garnish. Sharing with you a very easy recipe for a lazy weeknight or weekend dinner. Feel free to use your favorite veggies or meat. This meal is not only satisfying but can also be prepared under 15 minutes.
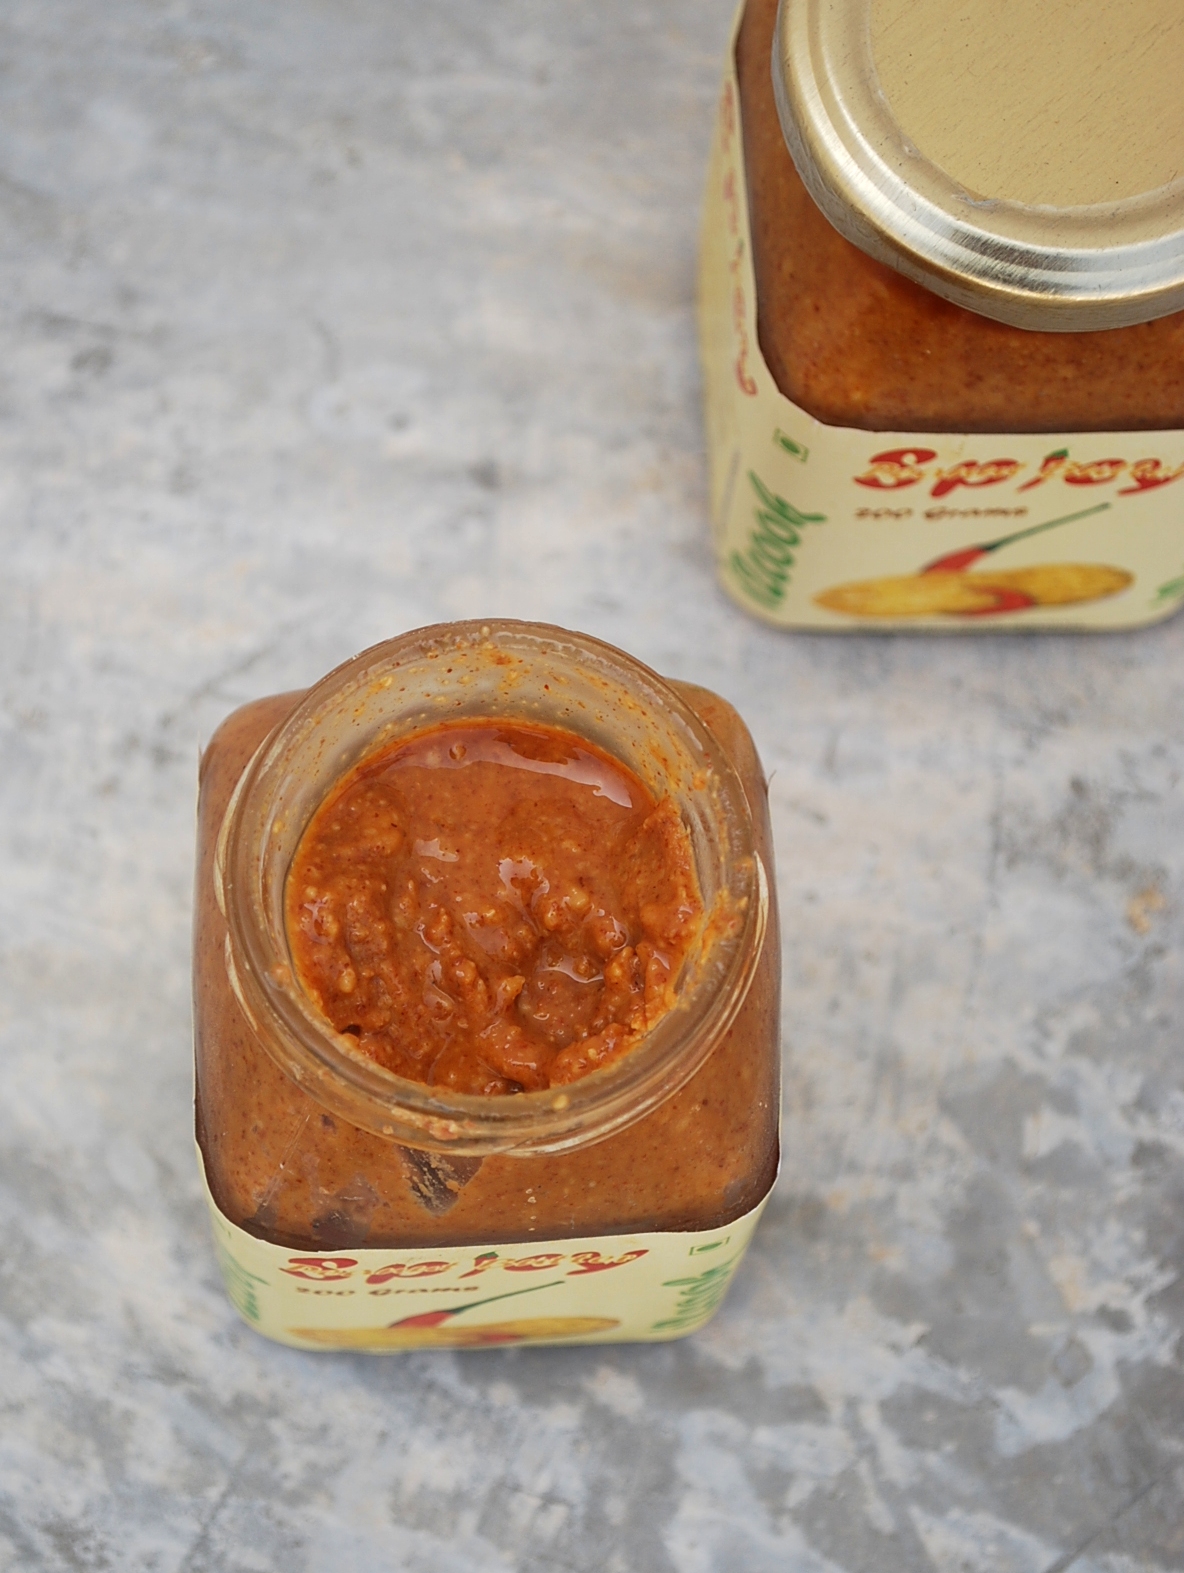
i2cook spicy peanut butter

i2cook peanut crunch
Ingredients
1 packet hakka noodles – 200gms (wheat), cooked and water drained
1 medium sized onion, peeled & sliced
4-5 peeled garlic, finely chopped
1 small capsicum, de-seeded and sliced
1 medium carrot, cut in thin strips
4-5 mushrooms, sliced
4-5 baby corn sliced & cooked (optional)
100gms i2cook spicy peanut butter
1/2 tbs soy sauce
1/2 tsp coconut or palm sugar
salt to taste
coriander or spring onion for garnish
i2cook peanut crunch (powdered peanuts for garnish)
toasted sesame for garnish (optional)
Procedure
- Heat oil in a wok and add garlic. Allow it to brown a little and add onions.
- Once the onions are soft, add carrots, mushroom, capsicum and babay corn. Cook until done.
- Take peanut butter, soy sauce, sugar in a bowl and add some water to form a smooth paste. Add this to the cooked vegetables and cook for a minute.
- Add salt to taste and noodles, mix well. Turn off the gas.
- Add some peanut crunch and coriander as garnish. Serves 2.

Know your flours & recipe for cranberry coffee cake
Posted: April 23, 2015 Filed under: Baking, Cake | Tags: amaranth, baking, buckwheat, cake, coffee cake, flours, gluten free, i2cook coconut sugar, millet flour, organic, polenta, ragi, unrefined, wholewheat Leave a comment If you have been a regular reader of my blog, you would have noticed that I don’t use any refined flours or any other ingredients in my baking. I have been using different kind of flours consciously or sometimes to make use of the left over flours lying in my pantry. Sharing with you a list of unrefined flours which can be used to create tasty and healthy bakes. Whole wheat flour/Atta/Chakki atta – I use whole wheat flour in almost everything I bake from cakes, breads,cupcakes to muffins. It is my best substitute to refined maida or white flour. This flour is a safe bet and if you are slowly switching over from white to whole flour, I suggest that you start with wheat flour. Your cakes or breads may turn out dense initially but you will soon learn to mix flours to give your bakes some nice body and lightness. Recipe for Apple Cake using whole wheat flour.
Ragi or finger millet – gluten-free and can give a little sandy taste at times. I personally, like to mix ragi with either one or more flours and some almond meal to combine a nutty taste. Recipe for gluten-free banana bread or egg-less chocolate cupcake.
Amaranth flour – this gluten-free and high on protein flour can be used in combination with various flour mixes. Amaranth flour tends to impart a strong flavor which may not be appealing to some. However, if the proportion of this flour in the baked item is less, you can add only the amaranth flour, like the gluten-free brownies or chocolate cake. Trying using amaranth & chocolate together, they are a match made in heaven! Recipe for Amaranth Brownies.
Brown rice flour – It is best to use in very small proportions. Brown rice flour is high on fiber as compared to the white flour. This flour can be used to make banana bread or cookies.
Buckwheat or Kuttu – this rarely found nutty flour can be a baker’s delight. Buckwheat like amaranth goes extremely well with chocolate and can be used in a lot of your baked dishes. Recipe for Chocolate Cake.
Corn flour or makki ka atta – This is another flour which should be used in small proportions, mixed with other flours. It is high on fiber. Do not confuse this flour to the refined corn flour which is used in Chinese dishes.
Cornmeal – Corn meal is also famously known as polenta. It is called polenta because the consumers don’t confuse it to be made of any other dish and also to indicate that it is ideal for making polenta. I had made this delicious cake with this ingredient once. This ingredient is coarse in nature unlike other flours. The other types of gluten-free flours are bajra (pearl millet) or jowar (sorghum) which I’m assuming will work well when mixed with other flours.
These flours work great in combination, rather than using just one flour due to its non-glutenous nature. Whole wheat works great for baking breads but you could also use finger millet or amaranth for that extra nutrition. You can also find mixed millet flours available in most of the organic shops which I’m yet to try. Different recipes call for different flours and I’ve been trying to include as many flours I can in my baking. The choice of using flours is up to you but the proportions is what you should be looking at closely. For eg: If you are using whole wheat and finger millet in a recipe, you could use 2:1 or can be even reduced to half the quantity in some recipes. The reason being that finger millet and most other flours come with a strong flavor and sometimes may over power your baked dish in taste and colour.  Here is a quick recipe for you to start getting acquainted with unrefined ingredients.
Ingredients for Cranberry Coffee Cake
200 gms whole wheat flour
50 gms corn flour
1 tsp baking powder
100 gms butter (salted)
2 free range eggs
250 gms coconut sugar
200 gms frozen or dried cranberries/blueberries
1 vanilla bean split powder
100 ml milk
25 gms chopped almonds
Recipe for Cranberry Coffee Cake
- Pre-heat oven at 180 degree centigrade
- Sieve, weigh and measure all the dry ingredients, flours and baking powder
- If using frozen cranberries, coarse grind them with vanilla and not into a fine paste
- Measure butter and coconut sugar and beat until well combined
- Add egg one by one and beat until it is well in combined with the butter and sugar mixture
- Combine both the dry and wet ingredients. Add cranberries and mix well
- Add milk and mix well until well combined
- Add this cake mixture into a greased pan, garnished with chopped almonds
- Bake for 40 minutes. Once done, allow it to sit for 10 minutes in the pan, before transferring to a wire rack for cooling.
- Eat warm with your favorite choice of toppings.

Peanut Butter Banana Smoothie
Posted: April 15, 2015 Filed under: peanut butter, Peanut Butter Recipes | Tags: banana, bangalore, healthy, i2cook, i2cook peanut butter, organic, peanut butter, protein rich, smoothie, workout 1 Comment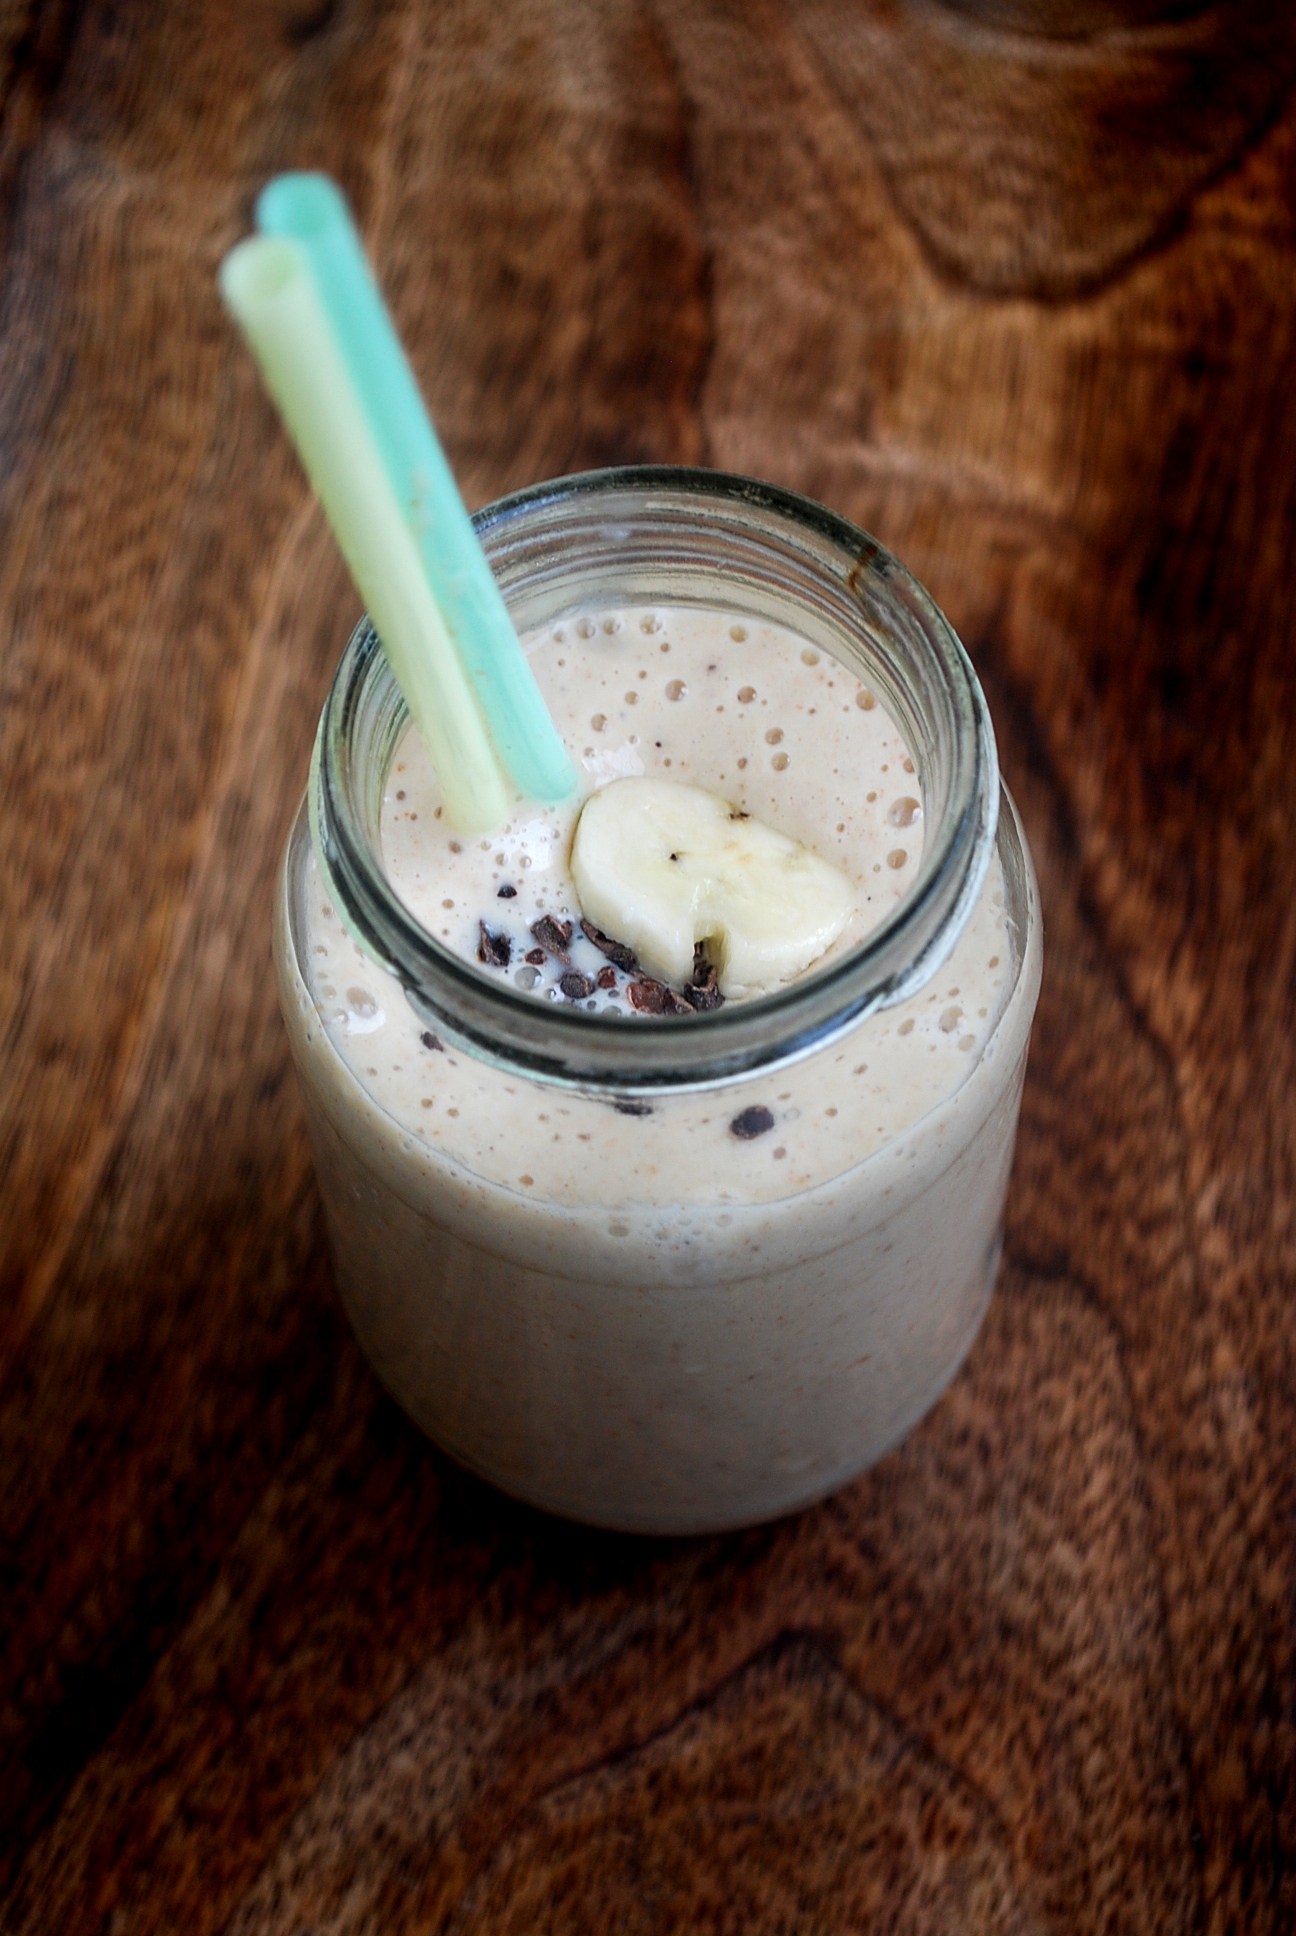 PB banana smoothie is high in protein and healthy fat, this recipe makes for a hearty breakfast, lunch, or after-workout snack. It’s easy to make , full of all sorts of delicious and healthy and protein-rich ingredients, and it’s the perfect use for ripe or overripe bananas. The yogurt creates a smooth desert-tasting consistency while providing healthy digestion. Adding ice is optional, and makes for a thicker, cooler smoothie. I prefer to drink it chilled!
Drink this after a workout to recharge your energy with heart healthy fat and protein. Banana adds additional fiber with Potassium, Manganese (helps in bone structure) and Vitamins. Yogurt adds probiotics which helps in healthy digestion along with calcium. You can also add nuts like almonds, walnuts or flax seeds to this for an extra crunch. I added some raw organic cocao nibs.
Ingredients
1 large banana or 2 small, peeled & roughly chopped
1/2 cup yogurt
1 tbs i2cook peanut butter
a pinch of cinnamon powder
1 tsp or more coconut sugar (optional)
Procedure
Blend all the ingredients in a blender until smooth. Serve chilled!
Introducing i2cook Quinoa – Eat Local
Posted: April 7, 2015 Filed under: i2cook Products | Tags: bangalore, eat local, gluten free, i2cook quinoa, India, non GMO, one pot meal, quinoa, vegan. burrito bowl, world health day Leave a comment

Today, on this world health day, I would like to talk about the super food “quinoa”. Diabetics being the prime most concern; over 30 million Indians have been diagnosed with diabetes, it is time for us to wake up and spend some time thinking about what we consume. That eat as you wish attitude is costing us our health and financially, hospital bills too.
This locally grown ingredient (Yes, locally grown, no more importing) is a super seed which can be consumed as a grain. The first project of growing quinoa was started by a farmer in India with the aid of our Government as a testing ground to see if this seed can be grown in a similar way as millets are commonly grown. The success of one farmer encouraged forty others to grow quinoa in the same region. This is a big change and this new revolution will not only help to provide farming with less water belts or drought laden area with a new crop, but will also encourage consumers to include it in their diet. This is a great news for Indian market, however the high price is still catering to the urban market. It is believed that as the demand rises and more and more farmers believe in the product there will be a huge change in the diet of several health affected Indians. Lets keep our fingers crossed.

Quinoa is a seed, the size of a millet. On cooking, it becomes translucent and the germ of the seed uncoils to form a little tail. Its leaves are not only fit for human consumption like any other green leafy vegetable but the excess of it can also be used as a fodder for cattle.
i2cook Quinoa is close to amaranth (millet) in terms of nutritional value. Here is the comparison between i2cook quinoa and amaranth seeds. However, it is difficult to use amaranth seeds in salads or pulav due to its sticky or non fluffy nature. i2cook Quinoa works great in salads and in pulav!
i2cook Quinoa can be cooked in a similar way as rice 1:2 ration, 1 cup of quinoa : 2 cups of water with a dash of rock salt in a pressure cooker (cook until one whistle) or in a pot, cook for 13 minutes. Quinoa from i2cook can also be sprouted to enjoy maximum anti oxidants.
i2cook Quinoa can be used as a substitute to your rice dishes or salads or in pretty much everything. I enjoy one bowl meal during summer and like to use quinoa as a base accompanied by lots and lots of vegetables. We recently made a burrito bowl for lunch and it made a nice wholesome and a lite meal. We served only 2 tbs of quinoa per person which was enough to take care of our daily nutrient in take.
i2cook Quinoa is grown without pesticide, non GMO and the main advantage of our quinoa is that you don’t have to rinse it many times as it does not contain any saponin which imparts a bitter taste if not rinsed several times.

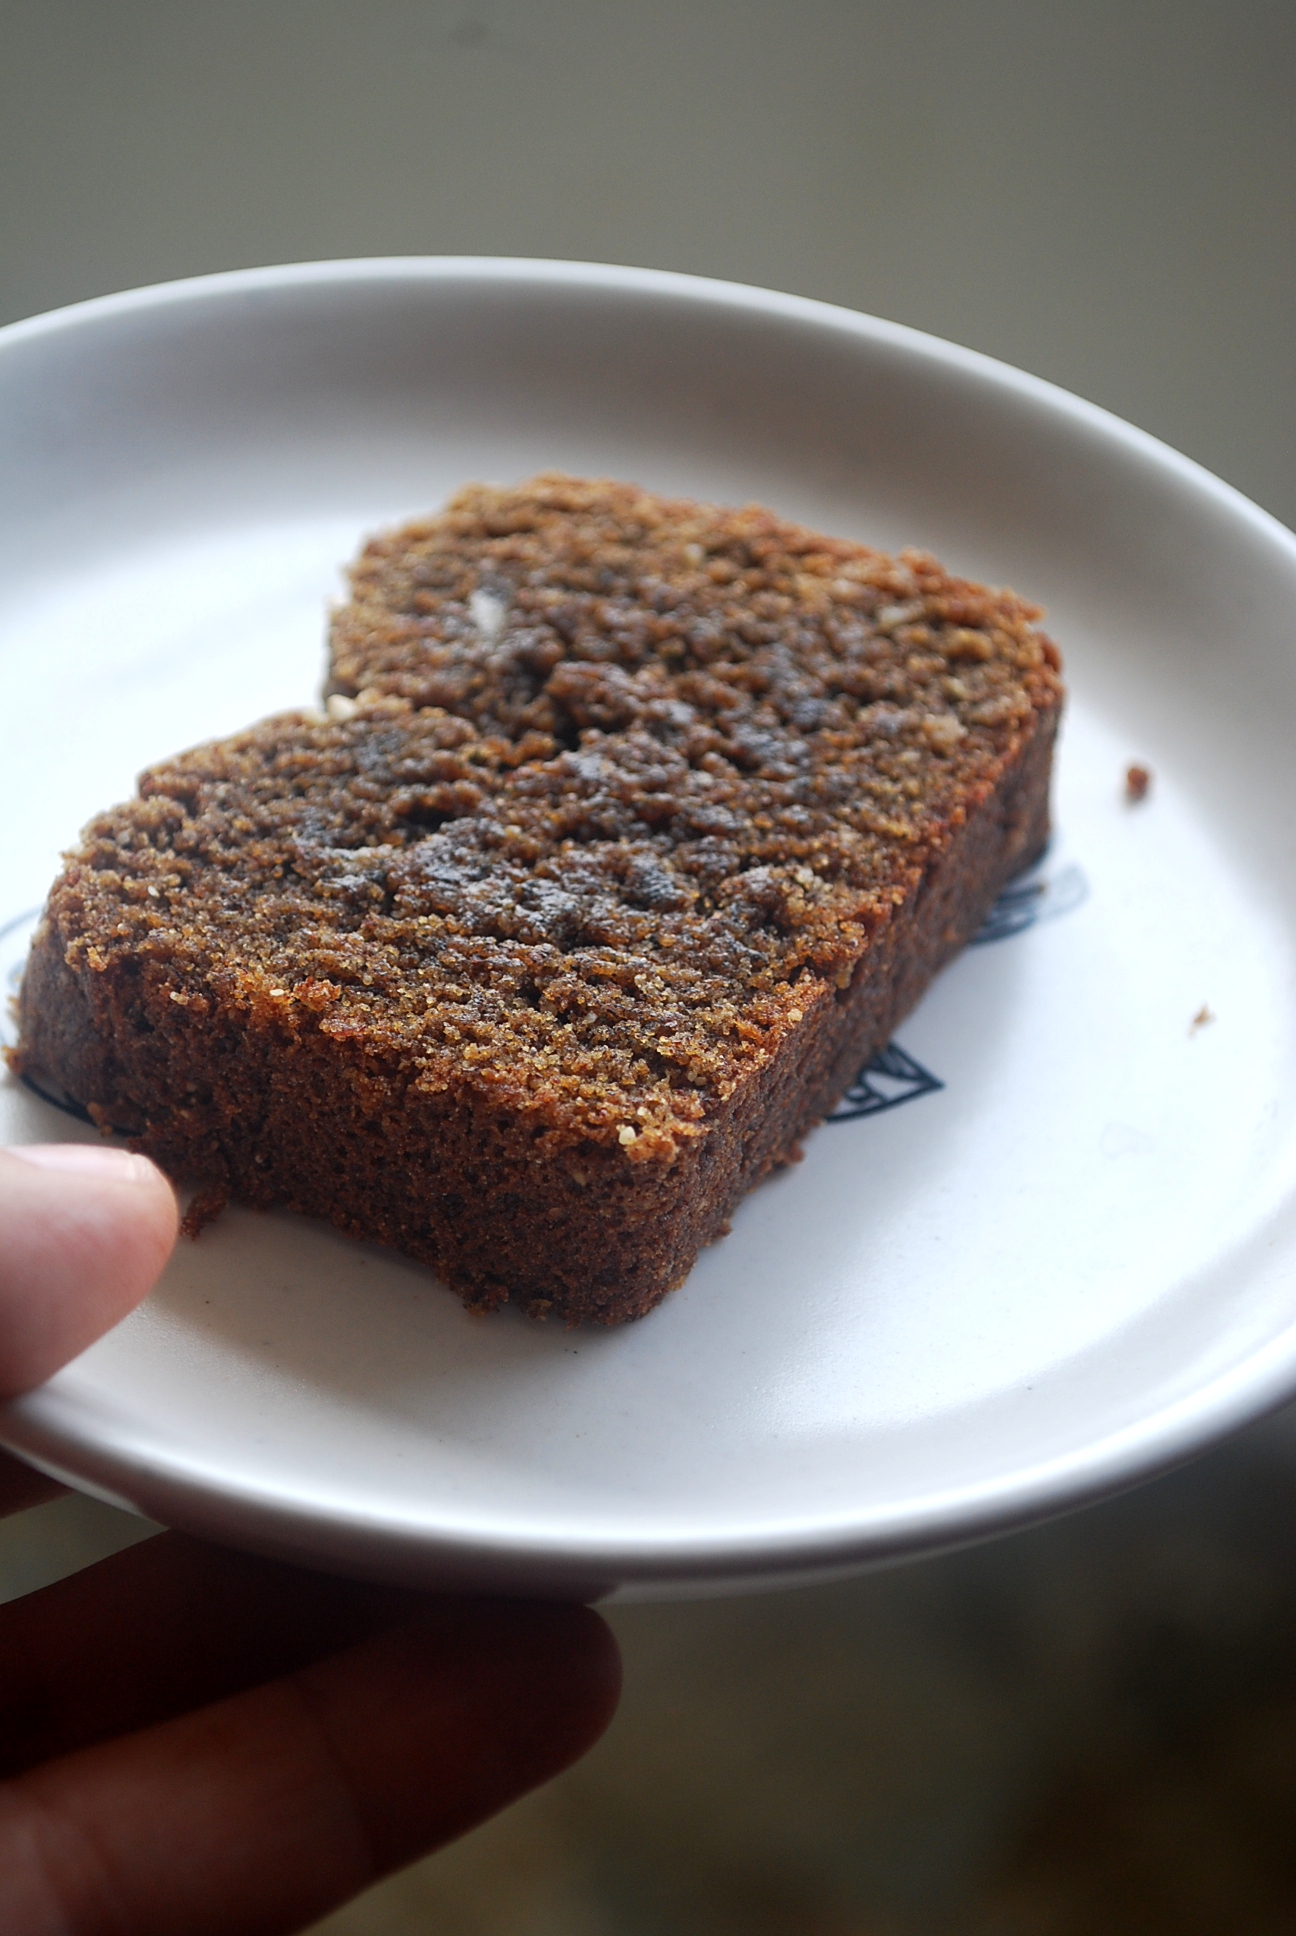
Gluten-free banana bread using i2cook’s coconut sugar
Posted: March 17, 2015 Filed under: Baking, Banana | Tags: amaranth, baking, banana bread, coconut oil, gluten free, healthy, i2cook coconut sugar, millets, organic, ragi, snacking, sos, sos organics 1 Comment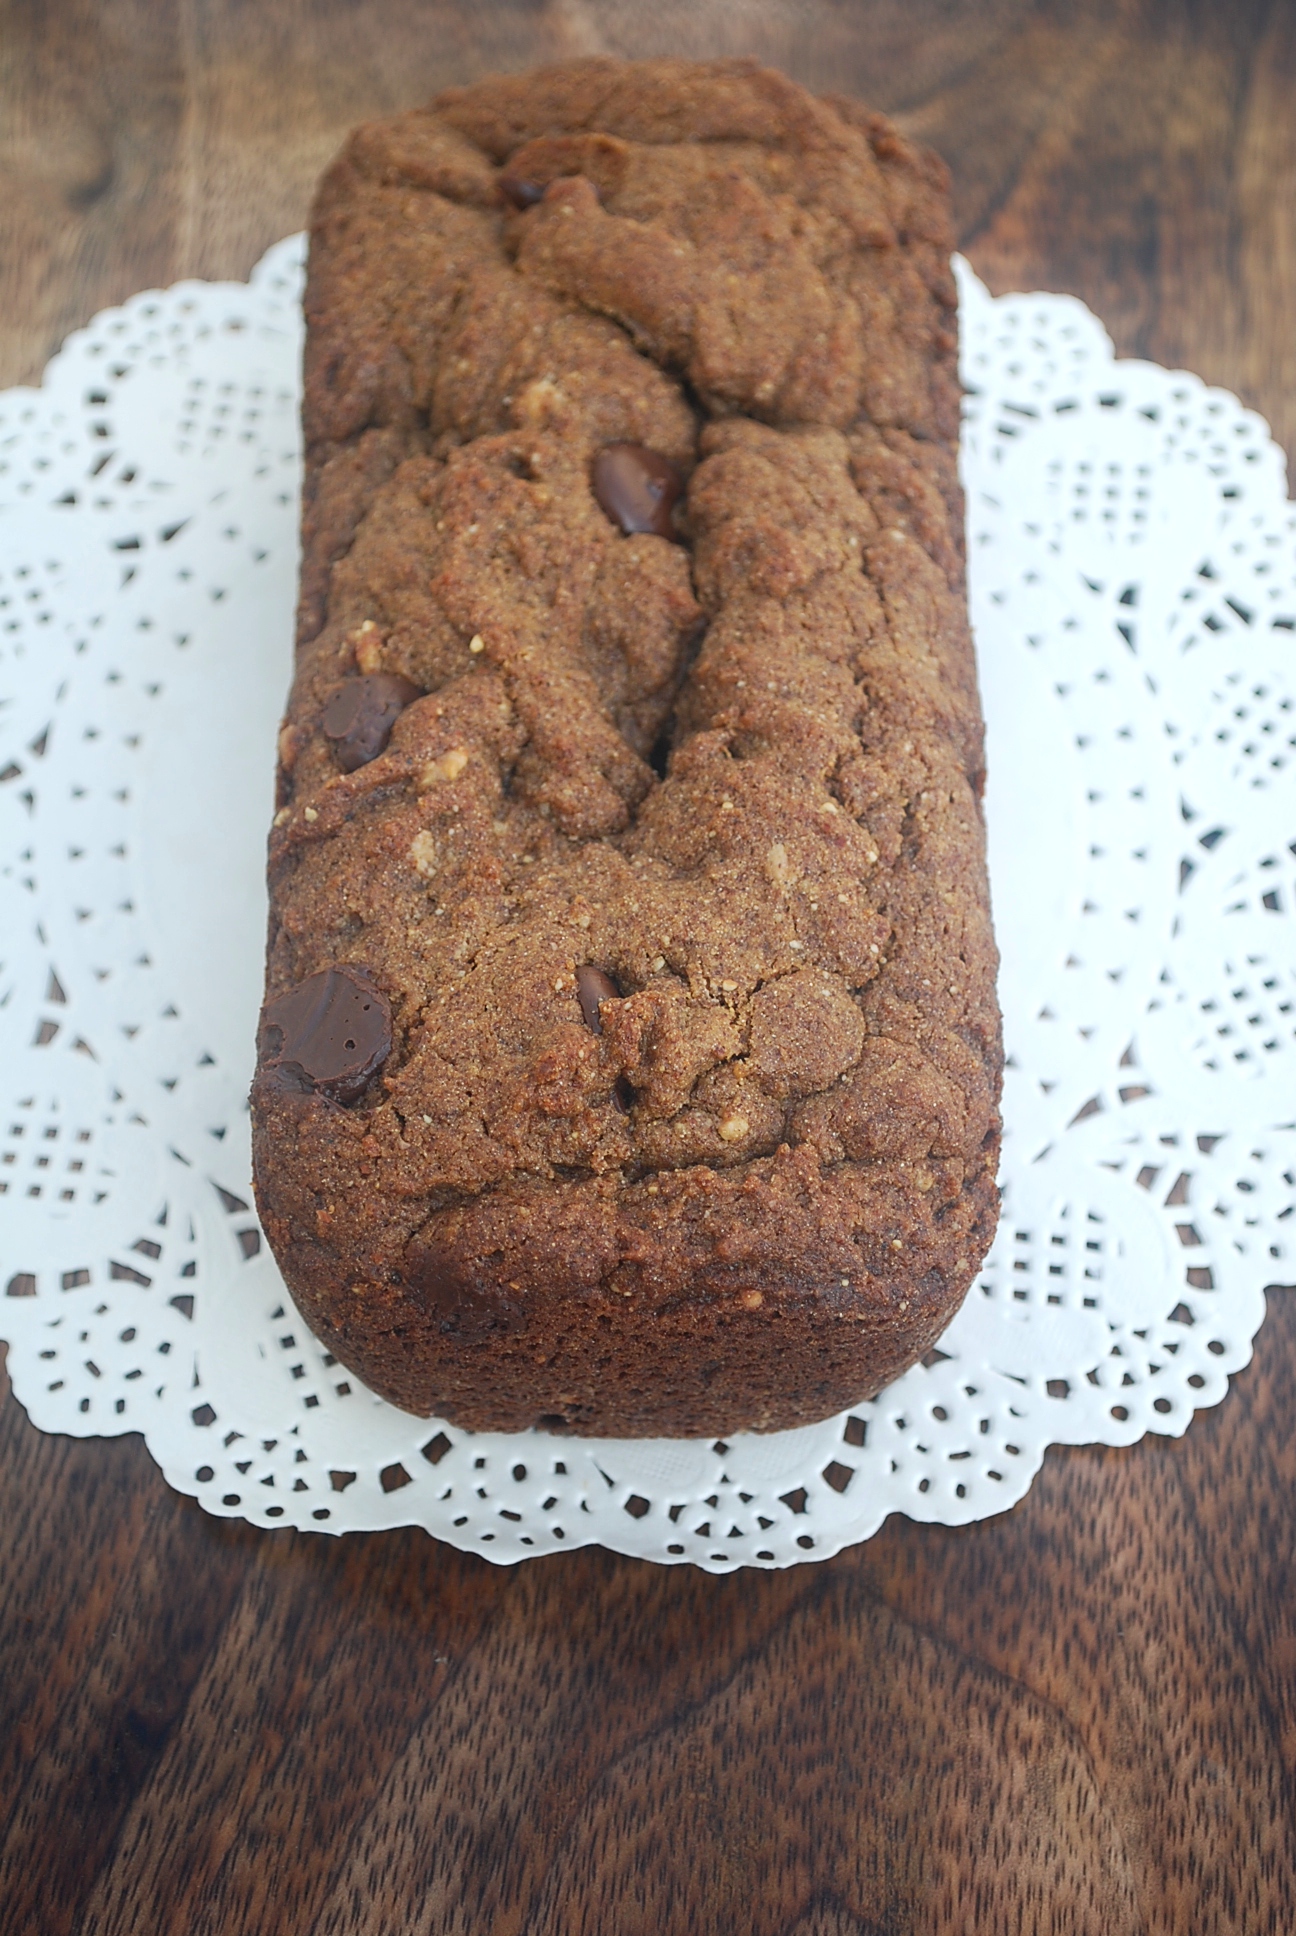 My all time favorite snack is banana bread. It is not only easy to make but it is so tasty and healthy! The best part about banana bread is that you can always play with different ingredients. I usually make banana bread with whole wheat flour. This time, I wanted to try the gluten-free version by using millet flours that were lying in my pantry for sometime. I’ve made this bread couple of times as this particular recipe has become one of my new favorite. I’ve used two types of millets – pearl and amaranth. The addition of almond meal gives this banana bread a nice texture and a nutty taste. Coconut oil is something that I love using in my banana bread as it imparts a pleasant aroma and is also an healthy option when compared to butter. More about coconut oil here and coconut sugar here.
Ingredients
75 gms finger millet flour or ragi
75 gms amaranth flour
50 gms almond meal
1 medium sized or two small over ripe banana, mashed
80 gms coconut oil (some extra to grease the pan)
80 gms coconut sugar
1 egg
1 tsp baking soda
a pinch of salt
few pieces choco chips or cocao nibs (optional)
Procedure
- Preheat the oven at 160 degree centigrade and grease a 8 by 4 inch loaf pan or equivalent.
- Sieve the flours along with baking soda and salt.
- Add coconut oil, coconut sugar and beat until mixed well. Add egg and lightly beat.
- Combine the dry and wet ingredients (with mashed banana) and mix some choco chips gently with the help of a spatula.
- Pour the mixture into the greased pan and bake for about 45 minutes or until its done based on your oven settings.
- Allow it to cool on a wire rack for about one hour before slicing.
Difference Between Organic & Natural Products
Posted: February 3, 2015 Filed under: Inspirations, Reviews | Tags: bangalore, certification, difference, farming, India, labels, natural, organic, organic market, stores Leave a comment
Organic is a growing sector and a lot of consumers are slowing converting their kitchen to organic. Most of the stores in India store both organic and natural products and sometimes due to insufficient information on the label, the consumer is often confused.
The term “organic” and “natural” are widely used and a lot of consumers are not sure what it means. Let me explain to you the difference between the two.
‘Natural’ means that the product has undergone minimal processing and does not contain any preservatives or additives, but the term is not protected in any way and there is no certification. However, “all natural” term is loosely used and doesn’t have any legal definition. Natural products can also be genetically modified organisms (GMO).
Organic products are those made entirely from natural substances, which in turn have been grown eschewing the use of artificial chemicals, fertilizers and pesticides. According to WHO, organic agriculture is a holistic production management system which promotes and enhances agro ecosystem health, including biodiversity, biological cycles and soil biological activity. Organic farming practices are designed to encourage soil and water conversation and reduce pollution. Farmers who grow organic produce and meat don’t use conventional methods to fertilize, control weeds or prevent livestock disease. Simply put, organic produce is grown without the use of any pesticide, synthetic fertilizer, genetically modified organisms (GMO) or sewage sludge. Animal products like meat, poultry, eggs and diary products don’t take any antibiotics or growth hormones. Animal products like meat, poultry, eggs are also termed as free-range, where the animals have outside access and is not couped up in a cell.
In India, the term “organic” is not legally protected for use in retail, and organic produce can also be sold without certification. FSSAI is currently in the process of notification of organic rules for the domestic market.
The retail chain Fabindia developed a three-tier labeling system that distinguishes between so-called natural products, products from farms in conversion to organic and fully certified organic products. ICCOA, also followed similar labeling system for vegetables sourced from Karnataka. Navdanya, the NGO gives the ‘navdanya gurantee’ for organically grown products, the credibility of which is based on the reputation of the NGO rather than on third party certification.
Organic labeling can be further categorized into 3 categories:
100% organic: made with 100% organic ingredients
Organic: made with 95% organic ingredients
Made with organic ingredients: made with organic ingredients without any certification
Since organic sector is an unorganized one in India, a lot of times you will see unbranded or non-labelled packets at stores. This may be due to several reasons, repackaging by the store (who doesn’t follow any labeling norms due to small supply), small production/supply, seasonal product, applied for certification and is in transition, cannot afford certification etc.
In Bangalore, it is common to see a lot of organic stores organizing twice a week sale of organic fruits and vegetables. These are mostly not certified and are sourced from farms on the outskirts. Organic in India, is mostly promoted on the basis of trust and the intent of the producer/seller. Since, certification cost is too high most of the small producers prefer to sell their goods through small retail outlets.
You might also like
How do I convert my kitchen to organic?
I like my chicken free-range..
Reference: Organic food marketing in urban centres of India
Gado Gado with i2cook’s spicy peanut butter
Posted: January 14, 2015 Filed under: Appertizer, Salads | Tags: coconut sugar, gluten free, healthy, i2cook, indonesia, organic, salad, spicy, spicy peanut butter, sugar Leave a comment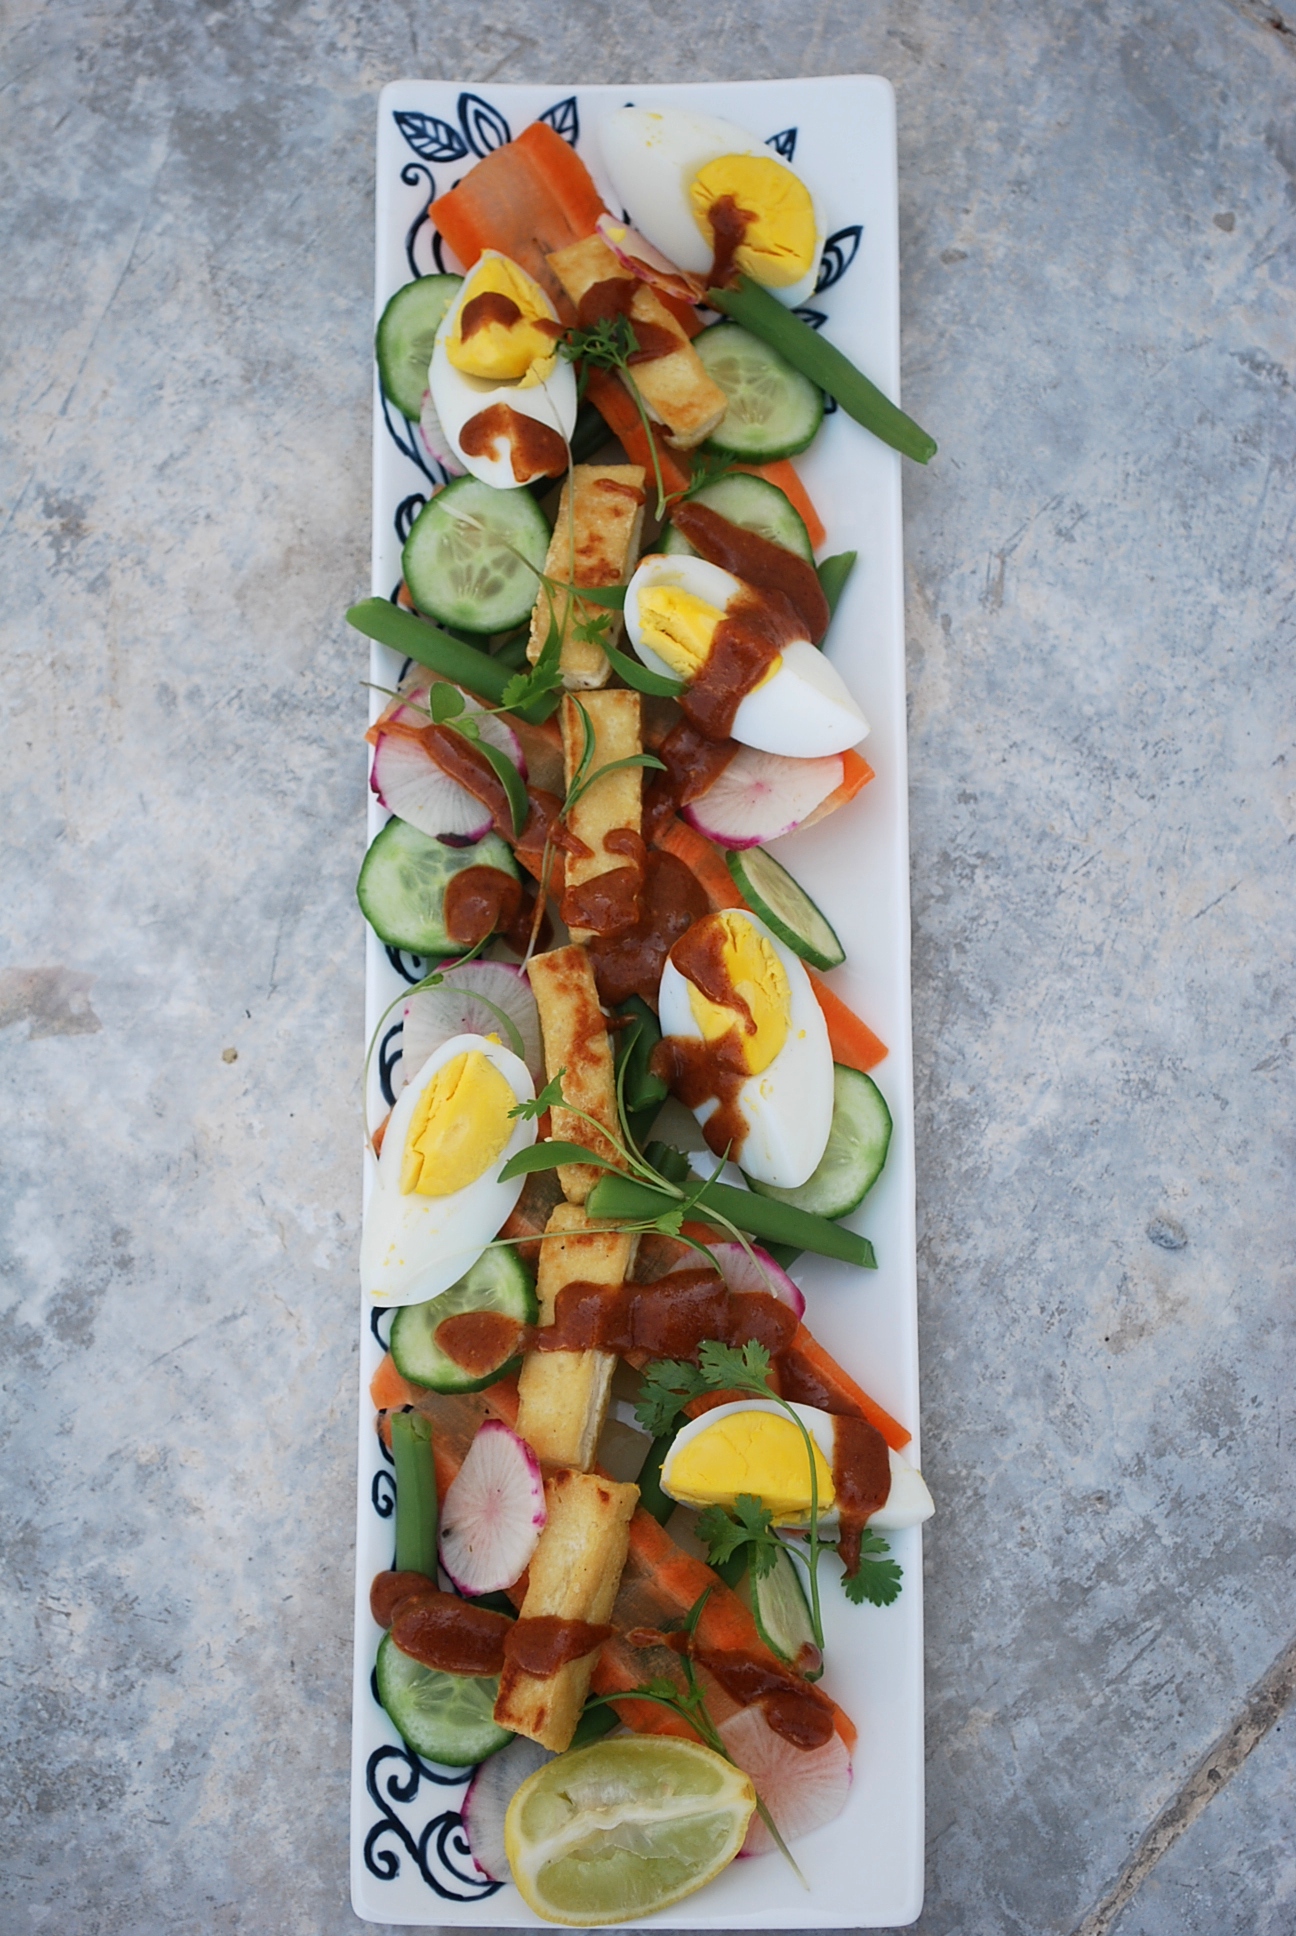
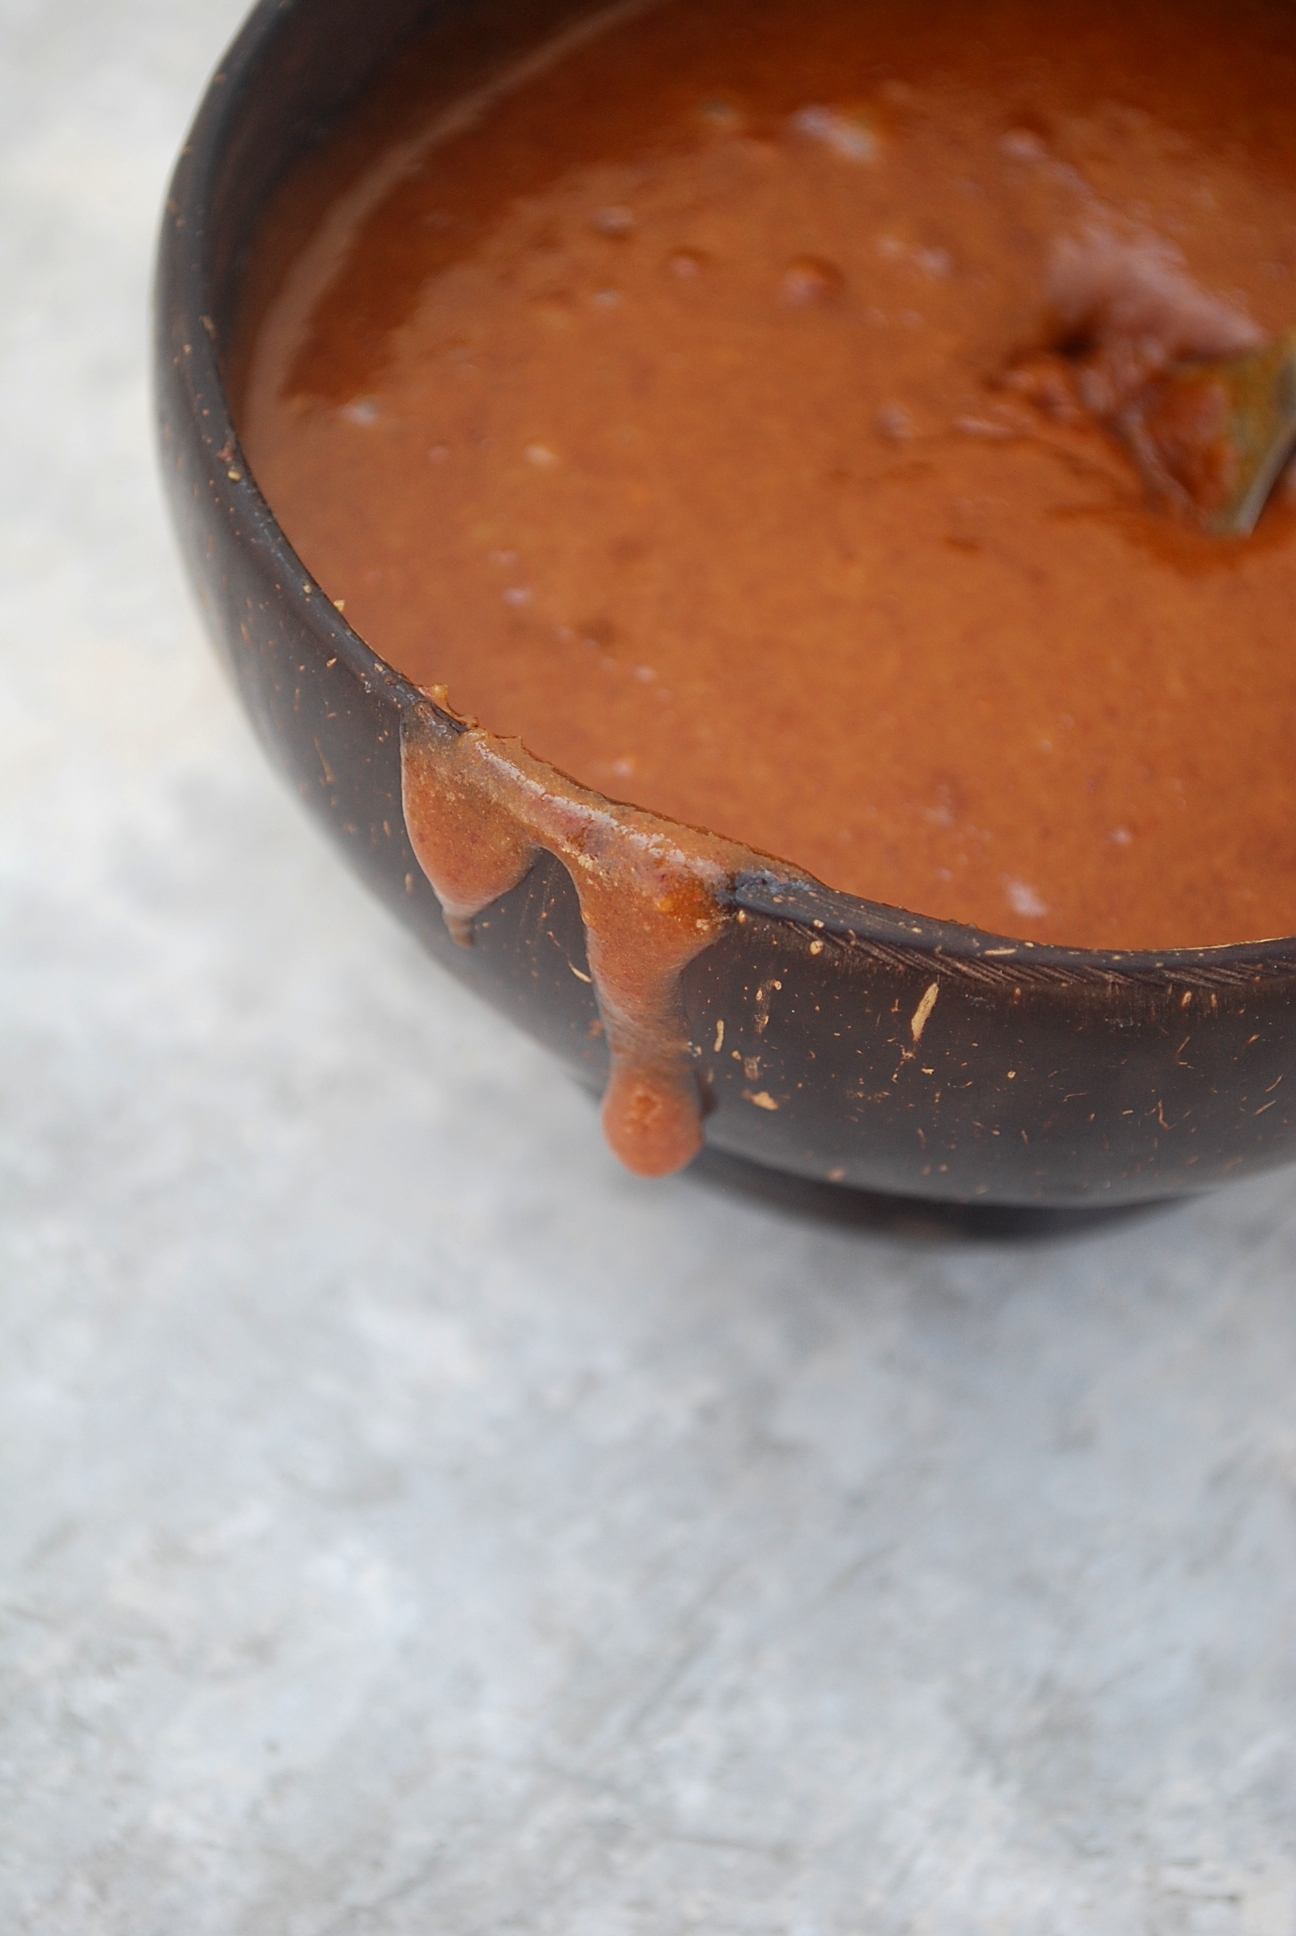
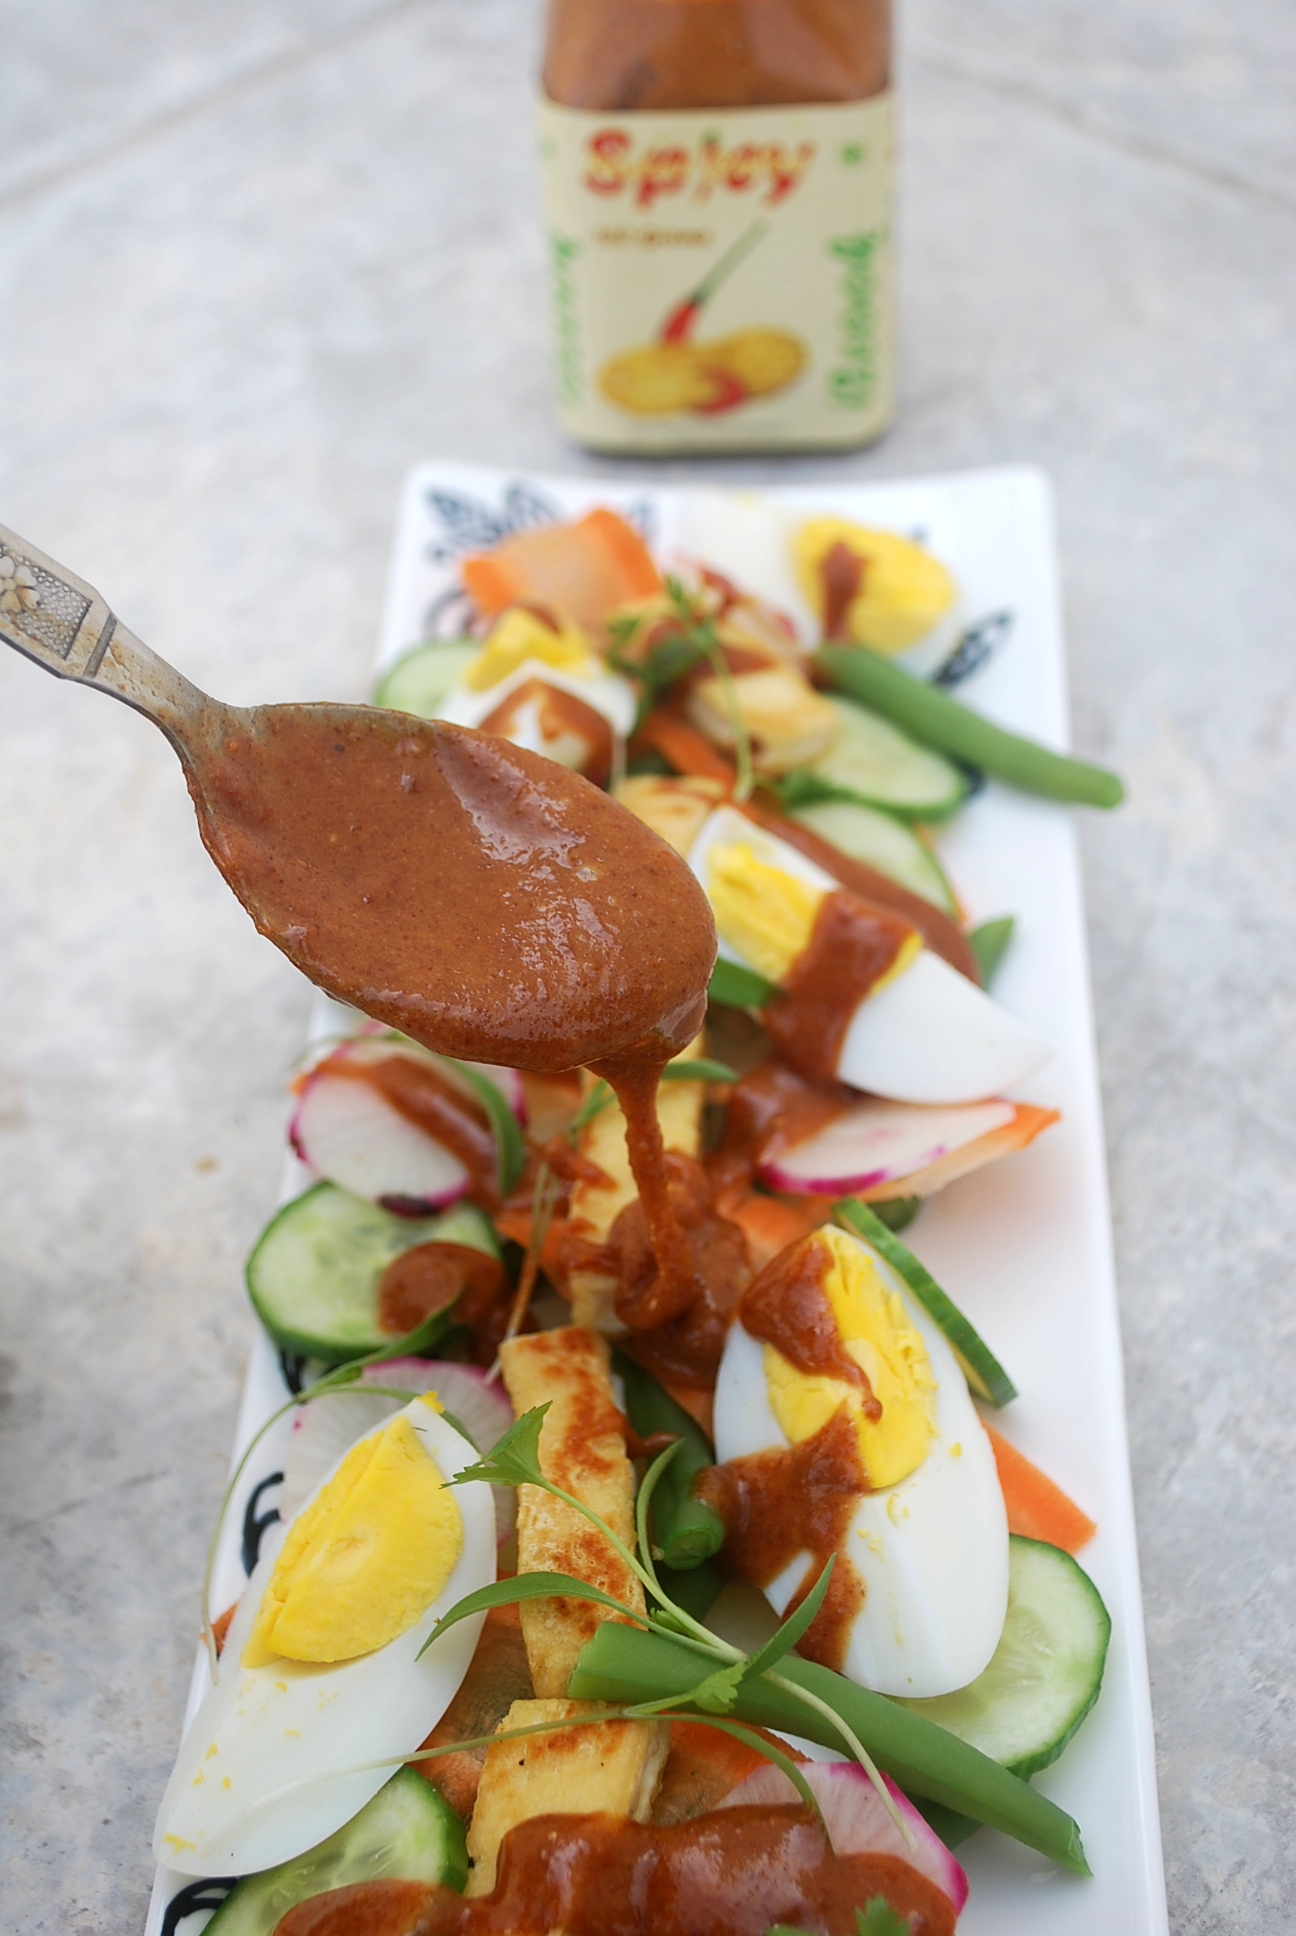
Gado gado is a wholesome and delicious Indonesian salad. This salad is filled with all the essential nutrients and what makes it so delicious is the peanut sauce, which is truly a winning combination. Gado gado is a combination of slightly boiled or steamed vegetables, raw vegetables and hard boiled egg. Nearly any combination of raw and cooked vegetables, along with rice or thin noodles, if you like, can be used. Gado gado, is true to its name which means “potpourri”. Do not confuse the peanut sauce with satay sauce. This salad can be made vegan by negating the eggs.
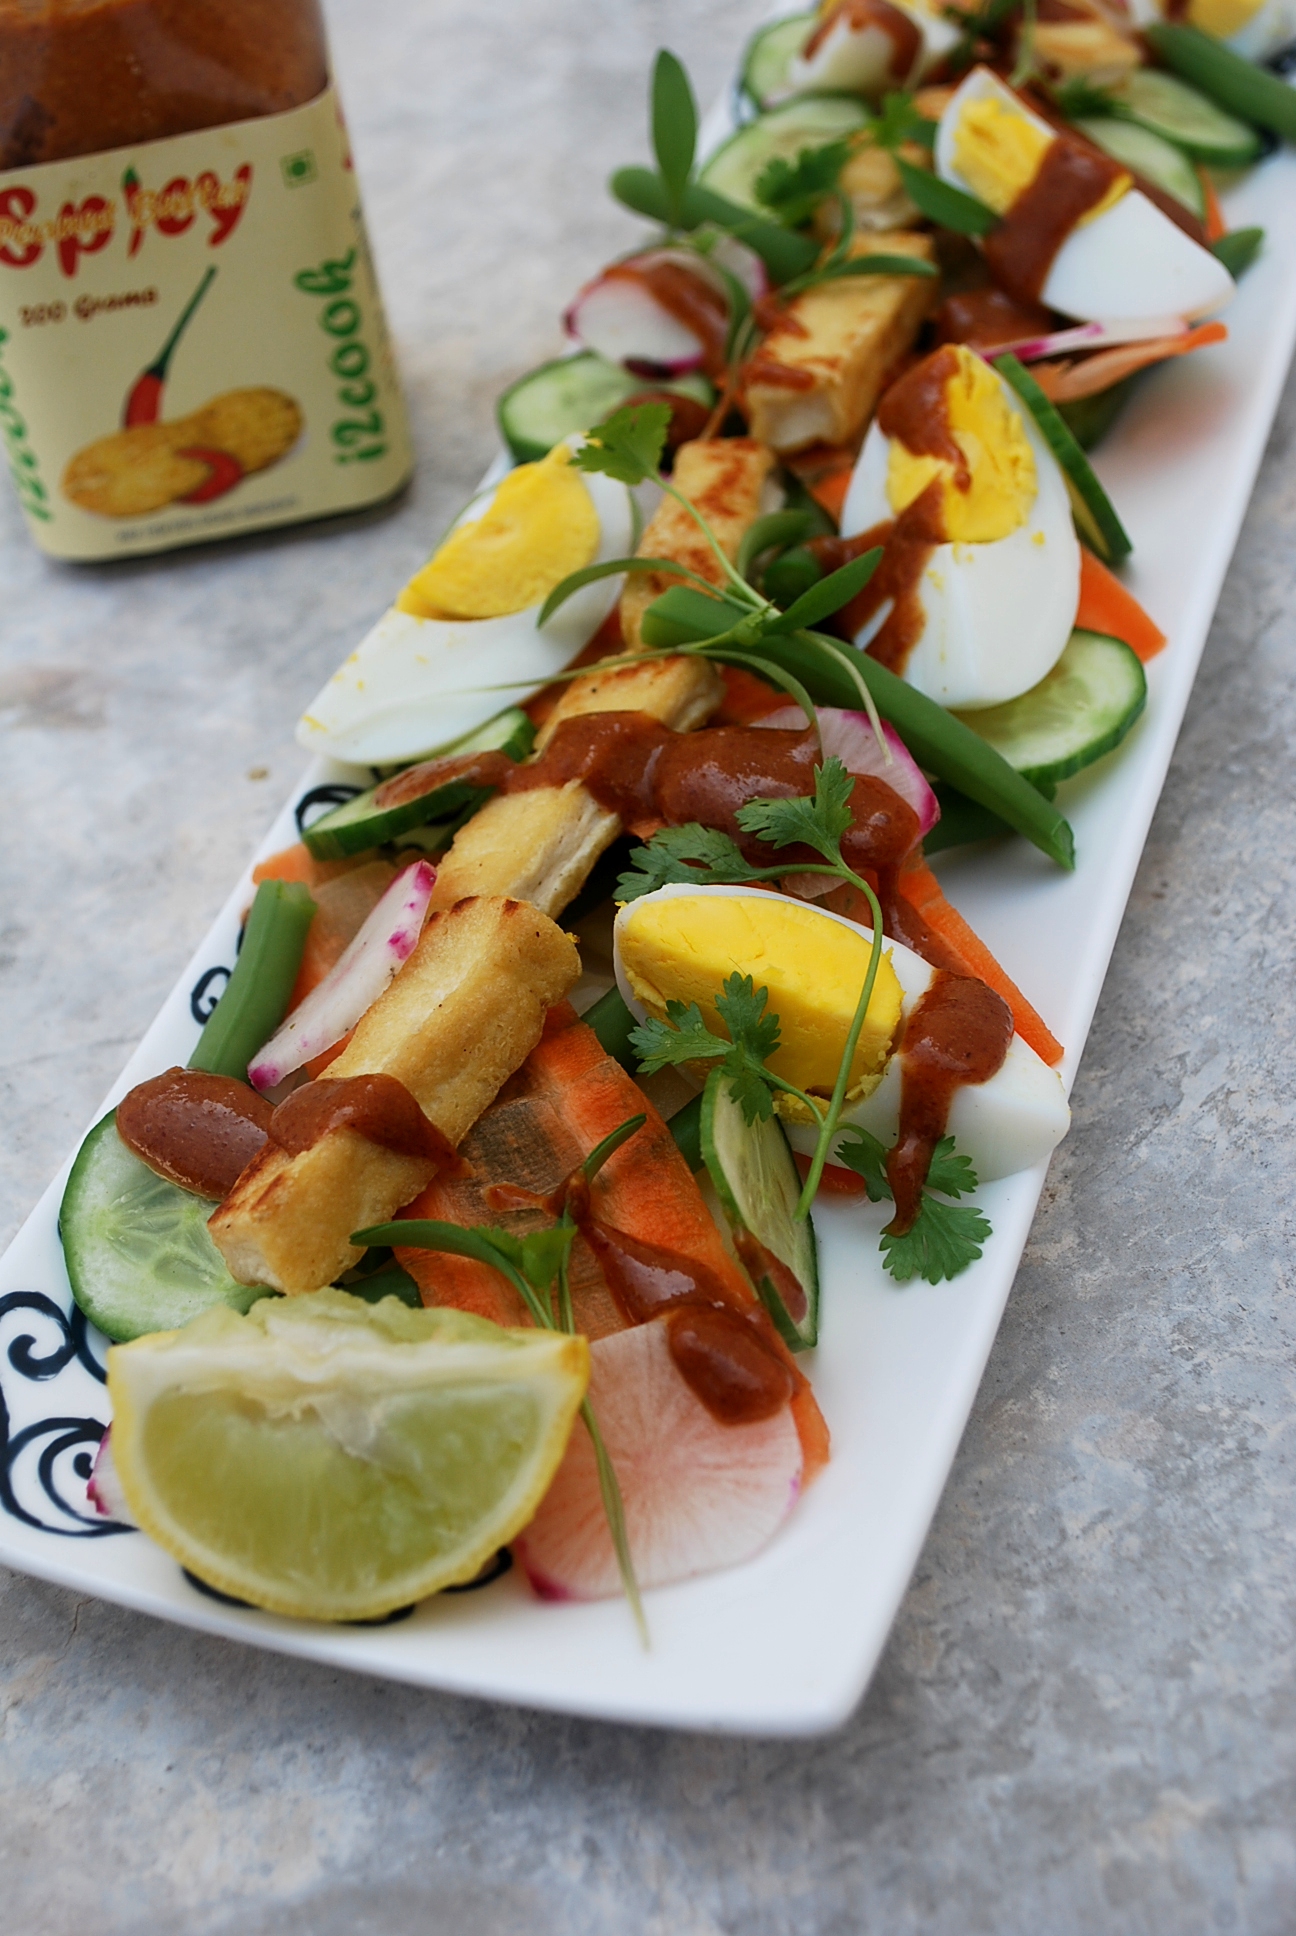
For the peanut sauce, we are using i2cook’s spicy peanut butter which is a versatile product and goes extremely well with south-east Asian or South Indian dishes.
Ingredients:
Inspired by Jamie Oliver
2 medium sliced boiled potatoes
10-12 beans boiled and cut into halves
2 hard-boiled eggs, cut into slices
carrot, raddish & cucumber sliced as per preference
8-10 tofu slices
fresh coriander leaves or micro-greens for garnish
Ingredients for the peanut sauce:
100gms i2cook spicy peanut butter
25gms i2cook coconut sugar or palm sugar
1 garlic clove
1/2 juice of lemon juice
1 tbs soy sauce
1/2 tbs tamarind paste
Note: spicy peanut butter will not require any addition of extra spice.
(all the ingredients used in this salad are all organic except the eggs which are free-range)
Procedure:
Start with prepping up with all the ingredients. Boil the potatoes for about 15 minutes in salt water. Hard-boil eggs, cut the tofu into slices (with some salt) and pan fry them in a little peanut oil until golden brown. Boil the beans in salt water for about 5 minutes and immediately transfer into ice water to retain that gorgeous green colour. Use strips of carrot and slice some cucumber and radish for that extra crunch.
Put all the ingredients for peanut sauce in a blender with 1 tbs of water and blend it until smooth. Check for seasoning.
Layer the vegetables starting first with potato and other ingredients on a serving plate or bowl and drizzle with the most amazing peanut sauce.